• Welcome
  • Blog
  • Recipes
  • Links
  • Contact
Menu

Hortus | 5

Street Address
City, State, Zip
Phone Number
A gardener's soliloquy

Your Custom Text Here

Hortus | 5

  • Welcome
  • Blog
  • Recipes
  • Links
  • Contact

Conquering Clay Soil

August 31, 2011 mario mirelez
clay-soil_hortus5.jpg

One of the last lines in the movie A Single Man are by the character George:

A few times in my life I’ve had moments of absolute clarity, when for a few brief seconds the silence drowns out the noise and I can feel rather than think, and things seem so sharp and the world seems so fresh. I can never make these moments last. I cling to them, but like everything, they fade. I have lived my life on these moments. They pull me back to the present, and I realize that everything is exactly the way it was meant to be.

I share those exact sentiments and they often translate to my gardening life.

Such was the moment when I came to understand that clay soil could not be effectively amended, at least not in large quantities. And as Indiana gardeners know, heavy clay soil can wear you down to the point of ‘throwing in the trowel.’ For a solid year I pondered the over-the-fence advice of gardeners and landscapers alike, each with their own proven method for dealing with clay soil. I listened, and researched– pouring myself over notes from my Master Gardner course and yet I remained stuck, as if planted in concrete. Their simple remedies, which ranged from incorporating additives such gypsum or topsoil, to “do nothing and wait it out.” All seemed doable, but felt instinctively wrong. Why did I remain so firm in my skepticism? I’d witnessed plants decline. Wished my shovel would magically turn into a jackhammer. I’d even seen the concrete-like surface refuse the Mantis, and in spots where it would take, it simply rickashayed off the many rocks or become tangled in tree roots. Only then did it occur to me that perhaps I was best qualified to make the decision on how to proceed. After all, it was me who had any actual experience with the soil.

And suddenly it hit me. An idea I’m sure I had suppressed long ago in hopes of substituting with a more academic solution– remove the bad soil. My moment of absolute clarity. And so began my extreme intervention. The intent? To remove at least 12 inches of the untillable soil and replace it with a mixture of top soil and organic matter.

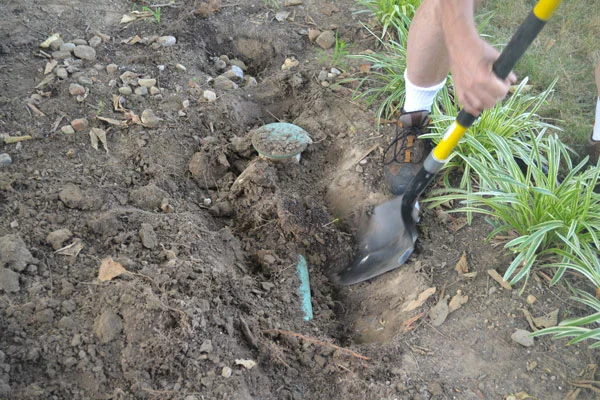
This would not be an easy task. The area in question was quite large. I created the diagram below to record my measurements and calculate how much fill I would need to replace the bad soil. It also served as a guideline for the excavator I was about to hire. The slide show below documents the details of this saga. 

New-Soil-Plan.jpg

fixing-the-grade_hortus5.jpg

Fall 2009: We regrade the East side of the front lawn after the 85 year old sewer line fails earlier that spring. The lawn has been dug at least 15 feet deep and has been settling all summer.

fixing-grade_hortus5.jpg

Besides regrading, we add a layer of top soil and mulch heavily. It is a gorgeous November day and everything is going well.

ready-to-plant_hortus5.jpg

These Hydrangeas and Yews had been in the ground for one season before they were dug up. They spent their second season in pots while the excavation work took place and the soil settled.

replanting_hortus5.jpg

The crew replants and prepares the beds. A few weeks prior, I receive a Peony order and they are planted at the other end of the bed.

planting-liriope_hortus5.jpg

Spring 2010: Eager to get the rest of the bed planted. 70 Liriope Variegata have been delivered and they need to get in the ground fast. This is when we discover the severity of the clay problem.

clay-soil-detail_hortus5.jpg

This detail clearly illustrates what we are dealing with. We try to spot ammend as we go. 

young-peonies_hortus5.jpg

The new Peonies in spring 2010. Surprisingly, they seem to be doing ok in the clay. No wonder they are the Indiana state flower! We are hesistant to plant much else in the bed.

wash-out_hortus5.jpg

The Liriope has done well throughout summer, but the clay is unable to absorb significant rain fast enough. The topsoil and mulch are washing away.

pushing_hortus5.jpg
pushing_hortus5.jpg

Spring 2011: Once again, the peonies push through the clay, but my spirits are sinking. This soil sucks!

clay-soil_hortus5.jpg

As the summer droughts ensue, it is literally hard as a rock. It develops large cracks as it dries out. This worsens poor drainage.

rocks_hortus5.jpg
rocks_hortus5.jpg

It is also littered with rock and pebbles. I can take it any more. Time to get estimates for labor and materials.

digging-plants_hortus5.jpg

A day before the work begins, I remove any plant material worth saving.

drain-removal_hortus5.jpg

A drain is also removed. Of course, it is in the high 90s and humidity is unbearable.

pots_hortus5.jpg
pots_hortus5.jpg

This is the staging area for the plants that have been saved. At the last minute, I also dig out some Yews so we can raise the grade beneath them.

indiana-mulch_hortus5.jpg

24 hours before the excavation, I have the new material delivered. Luckily there is an empty lot between the two houses where we can hold the material.

removal_hortus5.jpg
removal_hortus5.jpg

I contract with a local excavator who has done some work for our neighbors. Although we cannot avoid the tree roots, he knows to back off to minimize damage to the major roots.

close_hortus5.jpg
close_hortus5.jpg

I am impressed with how close he gets to the existing plant material with that big machinery. In the end, we decide to work around the Liriope, Peonies and Oakleaf Hydrangeas as they seem to be doing well.

ready-to-fill-_hortus5.jpg

All dug out and ready for the new fill.

marks-mix_hortus5.jpg

Bring it on!

load-after-load_hortus5.jpg

Load after load is placed in the newly dug bed.

soil-contrast_hortus5.jpg

What a difference in the new material! I selected Marks Mix from Indiana Mulch. Marks Mix is a composition of mushroom compost, black top soil, peat moss and hardwood fines.

raking-in_hortus5.jpg

The boys rake the new medium and level it out. They complain about the smell the whole time. Mushroom compost is a totally organic, rich, moist mixture of wheat straw, peat moss, cottonseed meal, cottonseed hulls, corncobs, cocoa bean shells, gypsum, lime, chicken litter and/or horse stable bedding. This combination of ingredients is used in commercial mushroom farms to grow mushrooms. Following production of mushrooms the compost is cooked off at 160 degrees for 10 hours to kill undesirable pests and is usually free from weed seeds. No wonder it smells!

settling-soil_hortus5.jpg

In less than 8 hours, the whole project is complete. The sprinkler is run to help settle the new medium. The small pile in the background will be used to fill in low spots and ammend other areas around the property. 

I now consider this my most significant gardening project to date. The expense and effort have been worth it. Already, the plants are thriving more than they have in the past two years. And when it rains, or I turn on a sprinkler (which is more the case these days), I sleep well knowing that those precious drops are being absorbed deeply, that the plants are benefiting from their new environment. And I now look forward to gardening again- and that’s what it’s all about.

So I close this post with another memorable quote from George.

If one is not enjoying one’s present, there isn’t a great deal to suggest that the future should be any better.

In Tools & Techniques Tags Clay Soil
← Everything goes with BlackBack in the Limelight →

Powered by Squarespace